

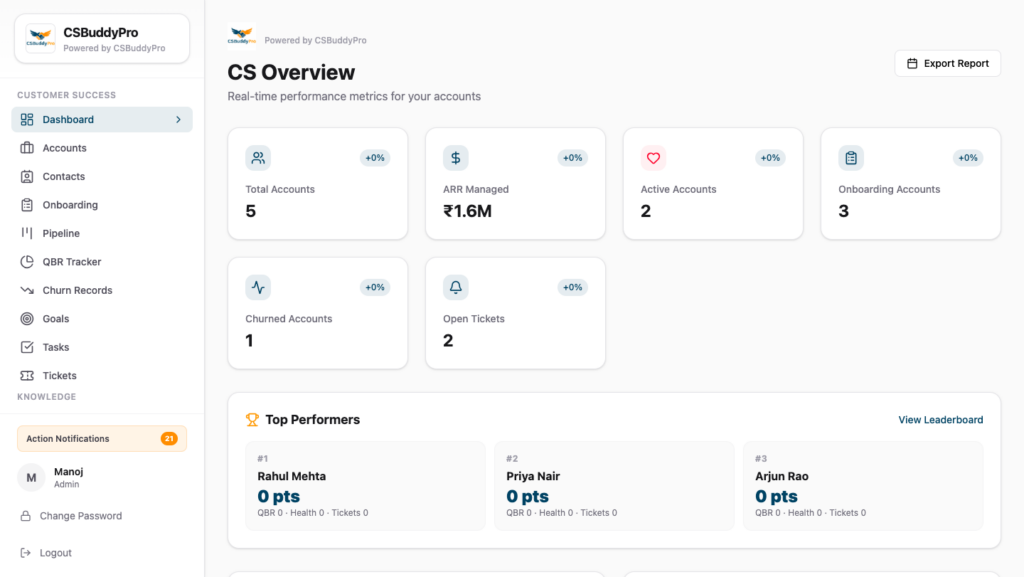
The fastest way to get started with CSBuddy Pro
If you’re evaluating CSBuddy Pro or exploring the platform for the first time, deploying it on Render with a Neon PostgreSQL database is the quickest way to get started.
This approach requires very little local setup and can be completed using free accounts on GitHub, Render, and Neon. It’s well suited for testing, demonstrations, development, and open-source contributions.
For production deployments, we recommend self-hosting CSBuddy Pro using Docker or your preferred cloud infrastructure.
Who is this guide for?
This guide is intended for:
- Customer Success leaders evaluating the platform
- Founders looking for an open-source Customer Success solution
- Developers contributing to the project
- Partners creating demo environments
- Anyone who wants to explore CSBuddy Pro without installing software locally
If you plan to run CSBuddy Pro on your own server or within your organisation’s infrastructure, you can skip this guide and follow the Docker deployment guide instead.
Why use Render?
There are two ways to run CSBuddy Pro.
The first is to install everything locally using Docker. This provides the greatest flexibility and is the recommended approach for production environments and long-term deployments.
The second is to deploy the platform using Render and Neon. This removes most of the infrastructure setup and allows you to focus on learning and testing the application.
For most first-time users, Render is the easier option.
The free plans offered by Render and Neon are sufficient for evaluation, development, personal projects, and open-source contributions. They do have resource limits, so they are not intended for production workloads, but they are more than capable of running a fully functional test environment.
Before you begin
You’ll need accounts for the following services:
| Service | Purpose |
|---|---|
| GitHub | Source code |
| Render | Application hosting |
| Neon | PostgreSQL database |
You’ll also need access to the official CSBuddy Pro repository:
https://github.com/csbuddypro-sys/csbuddypro
The deployment typically takes between 15 and 30 minutes.
Deployment overview
During this guide you will:
- Create your own copy of the CSBuddy Pro repository.
- Create a PostgreSQL database in Neon.
- Deploy the application to Render.
- Connect Render to your database.
- Configure the required environment variables.
- Start the application.
- Verify that the deployment completed successfully.
At the end of this guide you’ll have your own cloud-hosted installation of CSBuddy Pro that you can use for testing, evaluation, or development
Step 1: Fork the CSBuddy Pro Repository
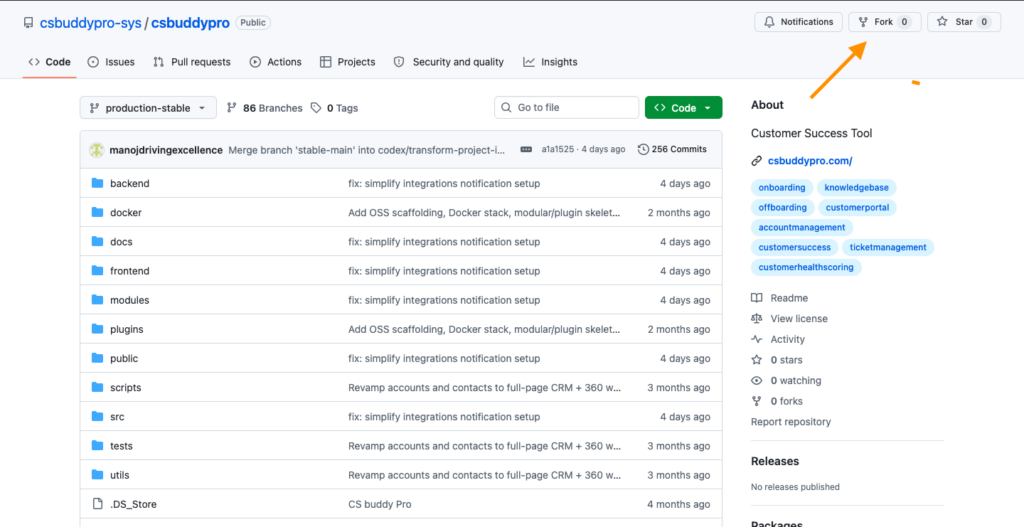
The first step is to create your own copy of the CSBuddy Pro repository on GitHub.
Forking the repository allows you to deploy, modify, and maintain your own version of the platform while preserving a connection to the official project. It also makes it easier to receive future updates and contribute improvements back to the community if you choose to.
If you only download the source code as a ZIP file, you won’t have version history or the ability to sync with future releases.
Open the official repository
Navigate to the official CSBuddy Pro repository:
https://github.com/csbuddypro-sys/csbuddypro
The repository contains everything required to deploy and run the platform, including the application source code, deployment configuration, Docker files, and documentation.
Before continuing, make sure you’re signed in to your GitHub account.
Create your own copy
In the top-right corner of the repository page, click Fork.
GitHub will ask where you want to create the new repository. Select your personal account or organisation, then confirm the repository name.
For most users, the default repository name is perfectly fine.
After a few seconds, GitHub will create your own copy of the repository.
The repository URL will now look similar to:
https://github.com/your-username/csbuddyproThis repository belongs to you, which means you can:
- Deploy it to Render
- Make your own changes
- Create branches
- Push updates
- Keep it private or public
- Sync future updates from the official CSBuddy Pro repository
Choose the correct branch
CSBuddy Pro uses the production-stable branch as the primary deployment branch.
If your fork opens on a different branch, switch to production-stable before deploying the application.
Using the stable branch ensures you’re deploying the latest tested version of the platform.
Clone the repository (Optional)
If you also plan to develop locally or use Docker later, clone your fork to your computer.
git clone https://github.com/your-username/csbuddypro.git

cd csbuddypro

git checkout production-stable
If you’re only following this guide to deploy on Render, you can skip this step. Render connects directly to your GitHub repository, so cloning the project locally isn’t required.
Verify your fork
Before moving to the next step, confirm that:
- The repository appears under your GitHub account.
- The repository contains the project files.
- The production-stable branch is selected.
- You can open the repository without any errors.
At this point, you have your own copy of CSBuddy Pro and are ready to create the PostgreSQL database that the application will use.
Step 2: Create a PostgreSQL Database with Neon
CSBuddy Pro uses PostgreSQL to store application data, including customer records, contacts, tickets, Knowledge Base articles, workflows, and platform configuration.
For this guide, we’ll use Neon, a managed PostgreSQL service that offers a free tier suitable for development, testing, and evaluation. Using Neon means you don’t need to install or manage a database on your own computer, making it an ideal choice for first-time deployments.
If you already have a PostgreSQL database hosted elsewhere, you can use that instead and skip to the connection string section below.
Create a Neon account
If you don’t already have an account, visit:
You can sign up using:
- GitHub
Once you’ve signed in, you’ll be taken to the Neon dashboard.
Create a new project
From the dashboard, click Create Project.
You’ll be asked to provide a few details for your new database.
Project Name
Choose a name that helps you identify the deployment.
For example:
csbuddyproor
csbuddypro-testSelect a Region
Choose a region that’s geographically closest to where your Render service will be deployed or where you’ll primarily access the application.
Keeping the database and application in nearby regions helps reduce network latency and improves overall performance.
PostgreSQL Version
Leave the default PostgreSQL version unless you have a specific requirement.
Neon automatically provisions a compatible PostgreSQL instance for your project.
Wait for the database to be created
Creating a database typically takes less than a minute.
Once the project is ready, Neon will automatically generate:
- A PostgreSQL database
- A database user
- A secure password
- A connection string
You’ll use this connection string when configuring CSBuddy Pro on Render.
Copy the connection string
Open your newly created project.
From the project dashboard, click Connect.
Neon will display a PostgreSQL connection string similar to the following:
postgresql://username:password@ep-example.ap-southeast-1.aws.neon.tech/neondb?sslmode=requireThis URL contains everything CSBuddy Pro needs to connect to your database.
Copy the entire connection string and keep it somewhere safe. You’ll paste it into Render in a later step.
Important: The connection string contains your database credentials. Treat it like a password and never share it publicly or commit it to GitHub.
Understanding the connection string (Optional)
You don’t need to modify the connection string, but it can be helpful to understand what it contains.
| Component | Description |
|---|---|
postgresql:// | Database protocol |
username | Database user |
password | Database password |
hostname | Your Neon database server |
neondb | Database name |
sslmode=require | Forces a secure encrypted connection |
CSBuddy Pro uses this URL through the DATABASE_URL environment variable.
Verify your database
Before continuing, confirm that:
- Your Neon project has been created successfully.
- The database status shows as active.
- You can access the Connect page.
- You’ve copied the full PostgreSQL connection string.
At this stage, there’s nothing else to configure in Neon. The required database tables will be created automatically during the deployment process when CSBuddy Pro runs its database setup.
Common questions
Can I use an existing PostgreSQL database?
Yes. As long as it’s compatible with PostgreSQL and accessible from Render, you can use any PostgreSQL provider instead of Neon.
Do I need to create tables manually?
No. CSBuddy Pro creates the required database schema during deployment. There’s no need to manually create tables before deploying the application.
Can I use the free Neon plan?
Yes. The free plan is suitable for development, testing, demos, and personal projects. If you later move to production or expect higher usage, you can upgrade your Neon plan or migrate to another PostgreSQL provider.
Step 3: Deploy CSBuddy Pro on Render
With your GitHub repository and PostgreSQL database ready, the next step is to deploy CSBuddy Pro on Render.
Render connects directly to your GitHub repository, builds the application automatically, and deploys it as a web service. Every time you push changes to your repository, Render can automatically rebuild and redeploy the application.
For first-time users, this is the simplest way to get CSBuddy Pro running without installing additional software locally.
Create a Render Account
If you don’t already have one, create a free account at:
You can sign up using:
- GitHub
Signing in with GitHub is recommended since you’ll be deploying directly from your GitHub repository.
Connect Your GitHub Account
Once you’re logged in, Render may ask for permission to access your GitHub repositories.
Authorize Render to access your GitHub account.
If you prefer, you can limit access to only your CSBuddy Pro repository instead of granting access to all repositories.
Create a New Web Service
From the Render Dashboard, click:
New → Web Service
Render will display the repositories available in your GitHub account.
Locate the repository you forked earlier.
It should look similar to:
your-username/csbuddyproClick Connect.
Configure the Web Service
Render will ask for a few deployment settings.
Name
Choose a name for your deployment.
For example:
csbuddyproor
csbuddypro-demoThis name is also used as part of your Render URL.
Branch
Select:
production-stableThis is the recommended deployment branch for CSBuddy Pro and contains the latest stable version of the application.
Region
Choose a region that’s closest to the Neon database you created in the previous step.
Keeping the application and database in nearby regions helps reduce latency and improves performance.
Runtime
Render should automatically detect the application as a Node application.
If it doesn’t, select Node manually.
Build Command
Use the following build command:
npm ci && npm run buildThis installs the required dependencies and builds the application for production.
Start Command
Use:
npm run startThis starts the CSBuddy Pro application after the build completes.
Instance Type
If you’re using Render’s free plan, select the Free instance.
For production environments, consider upgrading to a paid instance to avoid application sleep and to improve performance.
Configure Environment Variables
Before deploying, Render needs a few environment variables.
Click Advanced (or Environment, depending on the Render interface) and add the following variables.
| Variable | Value |
|---|---|
| NODE_ENV | production |
| DATABASE_URL | Your Neon PostgreSQL connection string |
| JWT_SECRET | A secure random string |
For the DATABASE_URL, paste the connection string you copied from Neon.
For the JWT_SECRET, generate a long random value. This is used to securely sign authentication tokens within the application.
If you plan to configure integrations such as Slack, SMTP, or OpenAI later, those environment variables can be added after the initial deployment.
Start the Deployment
Once you’ve reviewed the configuration, click Create Web Service.
Render will begin the deployment process automatically.
During deployment, you’ll see each stage complete in sequence:
- Cloning your GitHub repository
- Installing project dependencies
- Building the application
- Starting the server
- Performing health checks
The initial deployment may take several minutes depending on the current load on Render.
Monitor the Deployment Logs
You can follow the deployment progress from the Logs tab.
A successful deployment should complete without any build or runtime errors.
If an error occurs, the logs usually provide enough information to identify the problem.
Common issues include:
- Missing environment variables
- Invalid database connection strings
- Incorrect build or start commands
- GitHub authorization issues
Don’t worry if you encounter an error during your first deployment. Most deployment issues are caused by a missing configuration value and can be resolved quickly.
Access Your Deployment
Once the deployment finishes successfully, Render will assign your application a public URL similar to:
https://csbuddypro.onrender.comOpen this URL in your browser.
If everything has been configured correctly, you should see the CSBuddy Pro login page.
At this point, the application is deployed and connected to your PostgreSQL database.
The remaining steps involve verifying the deployment, creating the initial administrator account (if applicable), and testing the platform.
Before You Continue
Before moving to the next step, confirm that:
- The deployment completed successfully.
- No critical errors appear in the Render logs.
- The application URL opens in your browser.
- The login page is displayed.
- The application responds without server errors.
If the deployment doesn’t complete successfully, review the Render logs before making any changes. In most cases, the logs will point directly to the configuration that needs attention.
Step 4: Verify the Deployment and Complete the Initial Setup
Once Render finishes the deployment, it’s a good idea to verify that the application is running correctly before you begin exploring the platform.
This step confirms that the application is accessible, the database connection is working, and the initial setup has completed successfully.
Open Your Application
Return to your Render dashboard and open the web service you created.
Click the application URL, or copy and paste it into your browser.
It will look similar to:
https://your-app-name.onrender.comThe first request may take a little longer to load if you’re using Render’s free plan, as inactive services automatically go to sleep after a period of inactivity.
Once the application wakes up, you should see the CSBuddy Pro login screen.
Verify the Application Loads Correctly
Before signing in, check that the application has loaded correctly.
You should see:
- The CSBuddy Pro login page
- The application logo and branding
- Username and password fields
- No browser errors or blank screens
If the page doesn’t load or displays an error, return to the Render dashboard and review the deployment logs before continuing.
Verify the Database Connection
A successful deployment means the application is able to communicate with your Neon PostgreSQL database.
If the database connection cannot be established, you’ll usually see one of the following:
- An application error during startup
- A database connection error in the Render logs
- A server error when opening the application
If the login page loads normally, the connection has most likely been established successfully.
Sign In
Depending on the version of CSBuddy Pro you’re deploying, the initial administrator account may already exist or you may be prompted to create one during the first setup.
If default administrator credentials are provided in the project documentation, use those to sign in and change the password immediately after your first login.
If the application guides you through creating an administrator account, choose a strong password and store it securely.
Perform a Quick Health Check
After signing in, spend a few minutes confirming that the core parts of the platform are working as expected.
Open a few pages from the navigation menu and verify that they load without errors.
At a minimum, check:
- Dashboard
- Accounts
- Contacts
- Knowledge Base
- Administration
Don’t worry if there isn’t any data yet. At this stage you’re simply confirming that the application is responding correctly.
Create a Test Record
One of the quickest ways to confirm that the application is communicating with the database is to create a sample record.
For example, create a test customer account with the following information:
| Field | Example |
|---|---|
| Company Name | Acme Test Company |
| Customer Status | Active |
| Tier | Gold |
Save the record and refresh the page.
If the record is still available after refreshing, the application is successfully reading from and writing to your PostgreSQL database.
Once you’ve confirmed everything is working, you can delete the test record or keep it for later testing.
Review the Render Logs
Even if the deployment completed successfully, it’s worth reviewing the application logs for any warnings or unexpected errors.
From your Render service, open the Logs tab.
Look for messages related to:
- Database connectivity
- Missing environment variables
- Authentication
- Application startup
- Failed API requests
Occasional informational messages are normal, but repeated errors should be investigated before using the platform further.
Troubleshooting
The application doesn’t load
Check that:
- The deployment completed successfully.
- The service is running.
- You’re opening the correct Render URL.
If you’re using the free plan, wait a minute for the service to wake up before refreshing the page.
I receive a database error
Verify that:
- The
DATABASE_URLenvironment variable is correct. - The Neon database is active.
- The connection string hasn’t been modified.
- The application has been redeployed after updating environment variables.
The login page appears but I can’t sign in
Review the project documentation to determine whether your version of CSBuddy Pro includes default administrator credentials or requires creating an administrator account during the initial setup.